You’ve made hard-boiled eggs for your salad, and then—surprise—a dull green circle surrounds the yolk. It’s not harmful, but it certainly doesn’t look appetizing. For many of us, this small disappointment feels unfair, especially when we’ve carefully followed the cooking instructions. After all, you imagine peeling the shell to reveal a perfectly golden center, only to find a ring that makes the egg seem overcooked or stale. The truth is, this isn’t a failure of skill or proof that you’ll never be able to master the art of a simple boiled egg. It’s actually a common reaction, and once you understand why it happens, you’ll realize it’s completely avoidable without needing the precision of a Michelin-starred chef.
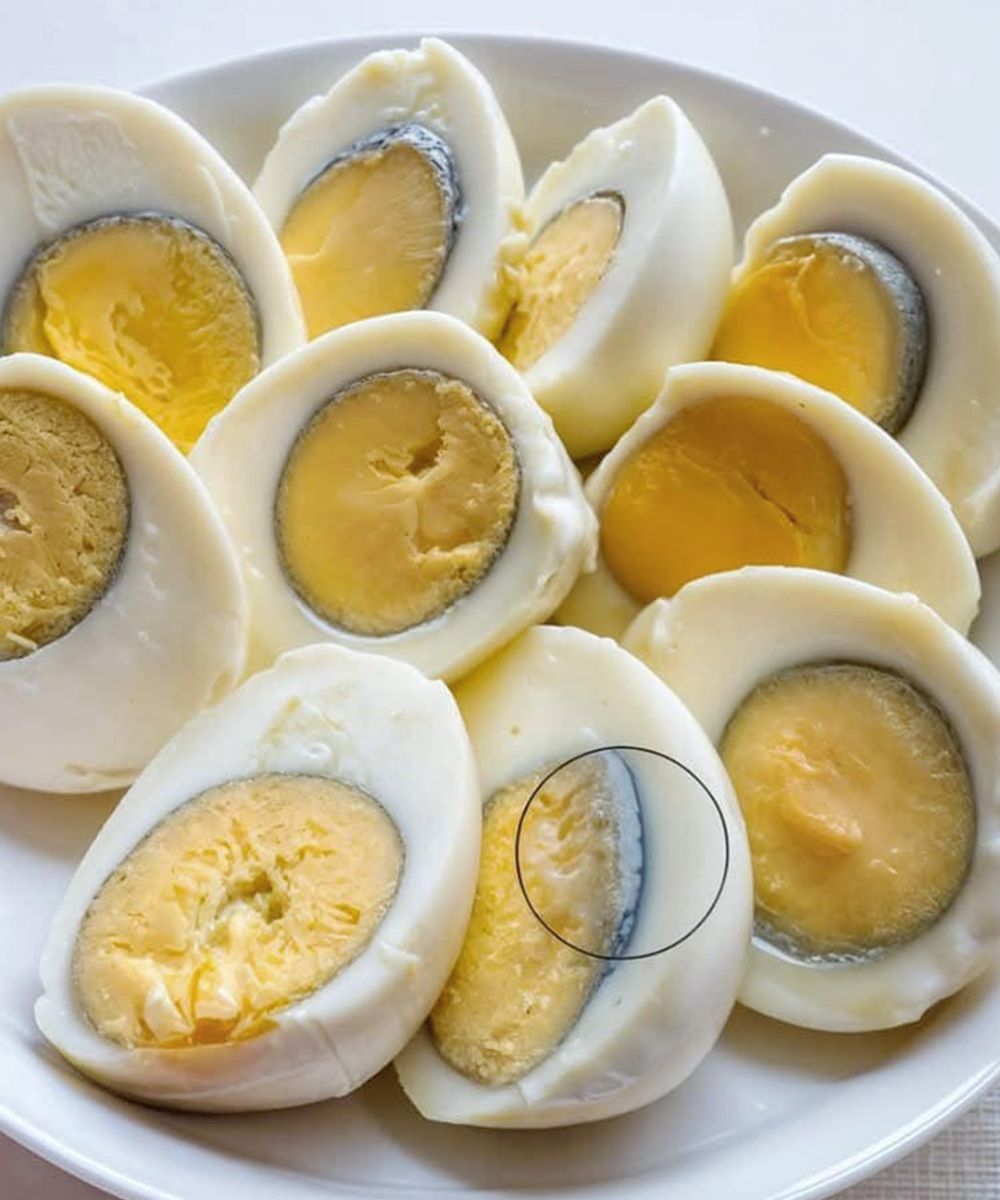
So, why does that green halo appear in the first place? The explanation is rooted in science, specifically in a chemical reaction between sulfur and iron. Egg whites naturally contain sulfur, and the yolks are rich in iron. When an egg is cooked for too long or at too high a temperature, the heat encourages the sulfur from the whites to react with the iron from the yolk. This reaction forms ferrous sulfide, which has a greenish tint. It settles right around the yolk because that’s where the two elements meet. In other words, the green ring isn’t about freshness or quality—it’s simply about how the egg was cooked.
Overcooking is the biggest culprit. Many people, out of fear that their eggs will be underdone, leave them in boiling water for far too long. While this does ensure that the yolk is firm, it also guarantees that the chemical reaction will have enough time to occur. Another factor is the cooking temperature. Eggs boiled at a rolling, aggressive boil rather than a gentle simmer are more likely to develop that green border. And if you’ve ever noticed a slightly sulfuric smell along with the discoloration, that’s no coincidence—it’s another byproduct of the same reaction.
The good news is that avoiding this issue is easier than you might think. The first tip is to control the cooking time. Instead of letting the eggs boil endlessly, time them carefully. For a classic hard-boiled egg with a fully set yolk, around 9 to 12 minutes in hot water is more than enough. Go much beyond that, and you’re inviting the green halo to form. If you prefer your yolk slightly softer and creamier, you can stop closer to the 8 or 9-minute mark. This not only prevents discoloration but also results in a more flavorful and tender egg.
Another trick lies in how you cook them. Rather than boiling the eggs from the start, place them in a pot, cover with cold water, and bring it to a gentle boil. Once the water reaches a boil, reduce the heat immediately to a simmer and start timing. The gentle cooking process helps prevent the reaction from happening too aggressively. Some people even prefer the steaming method—placing eggs in a steamer basket over boiling water for about 10 minutes—which can yield even more consistent results.
Equally important is what you do after cooking. Rapid cooling is the secret step that many skip. Once your eggs are cooked, transfer them immediately into a bowl of ice water or run them under cold water for several minutes. This halts the cooking process right away, ensuring the yolks don’t continue heating internally. It also makes peeling the eggs easier, a bonus for anyone who’s struggled with stubborn shells. If you’ve ever wondered why professional kitchens churn out trays of perfectly yellow-centered eggs, this quick cooling step is one of their simplest but most effective secrets.
It’s also worth considering the age of the eggs. Interestingly, slightly older eggs tend to peel more easily after boiling, while very fresh eggs can sometimes cling stubbornly to their shells. However, age doesn’t directly affect the green ring—it’s still all about cooking and cooling. That said, if your eggs are past their prime, the whites may be looser, which can make timing more critical.
Now, what if you’ve followed all the advice and still occasionally find a faint green circle? Don’t worry. The discoloration might be unappealing, but it’s perfectly safe to eat. Many people around the world consume eggs with this ring without giving it a second thought. The main issue is purely cosmetic, especially if you’re serving a dish where appearance matters, like deviled eggs or a vibrant salad. If you’re just making an egg sandwich for yourself, the flavor won’t be noticeably different. But if you want those Instagram-worthy results, precise timing and cooling are non-negotiable.
There are even small variations you can try depending on your preferences. Some cooks swear by adding a pinch of baking soda or vinegar to the water to adjust the pH and reduce the chance of discoloration, though the results can be mixed. Others recommend poking a tiny hole in the wide end of the egg with a pin before boiling, which helps release trapped air and can lead to a more uniform cook. These little tweaks aren’t strictly necessary, but they can make the process more fun and give you an excuse to experiment.
Think, for example, about preparing eggs for a picnic potato salad. You’ve boiled a dozen eggs, cooled them in ice water, and carefully peeled them to reveal glowing yellow yolks with no green rings in sight. When you slice them open and stir them into the dish, the bright, fresh color immediately makes the salad more inviting. Or imagine serving deviled eggs at a party. That small detail—the golden centers free from any grayish-green shadows—can elevate the entire presentation and impress your guests, even if they can’t put their finger on why.
At the end of the day, mastering hard-boiled eggs is less about following complex culinary techniques and more about respecting the simple science behind them. Shorten the cooking time, keep the temperature steady, and cool them quickly afterward. With these easy adjustments, you can say goodbye to that pesky green circle for good. And the best part? You’ll never again feel frustrated when your eggs don’t look the way you imagined. Instead, you’ll enjoy consistently perfect results that taste as good as they look, proving that sometimes the most satisfying kitchen victories come from understanding the little details.